

Recipes

Healthy Twix Bars
These Healthy Twix Bars are everything you love about the classic — a buttery biscuit base, gooey date caramel, and a rich chocolate top — reimagined with wholefood ingredients and a boost of collagen for a treat that nourishes as much as it satisfies. Prep time: 20 minutesCook time: 12 minutesSet time: 1 hourMakes: 10–12 bars You'll need: Base 1 1/2 cups almond flour 1/3 cup coconut oil, melted 2 tbsp maple syrup Pinch of salt Caramel 1 cup Medjool dates, soaked for 15 minutes then blended into a paste 2 heaped tbsp Mayver's powdered peanut butter 2 tbsp maple syrup 1 tsp vanilla extract Pinch of salt Chocolate Top 150g Noshu dark choc chips 2 scoops Gelpro Cacao + Collagen Superblend 1 tsp coconut oil Flaky sea salt, to finish Method: Preheat your oven to 180°C and line a loaf tin with baking paper. In a bowl, mix all the base ingredients together until a thick dough forms. If it feels too wet, add a little extra almond flour. Press the dough evenly into the tin and bake for 12 minutes, or until lightly golden. Set aside to cool slightly. Blend the soaked Medjool dates into a smooth paste, then mix through the Mayver's powdered peanut butter, maple syrup, vanilla and a pinch of salt. Spread the caramel layer evenly over the cooled base. Melt the Noshu dark choc chips with the coconut oil (gently in a saucepan or microwave), then whisk in the 2 scoops of Gelpro Cacao + Collagen Superblend until smooth and glossy. Pour over the caramel layer. Freeze for at least 1 hour, or until the chocolate top is firm. Sprinkle with flaky sea salt, slice into bars, and serve. NOTE: These bars are best kept in the freezer in an airtight container for up to 2 weeks. Let them sit at room temperature for 5 minutes before eating for that signature chewy-caramel bite. They'll also keep in the fridge for up to 5 days if you prefer a softer texture. If you make these Twix bars, please share it with us by tagging us on Instagram @gelproaustralia #gwellclub #gelproaus
Learn more
Nourishing Immunity Soup
This nourishing Immunity Soup is a warming, broth-based bowl packed with wholefood goodness — tender chicken, lentils, ginger and a boost of grass-fed beef liver for a deeply restorative meal that comforts and replenishes. Prep time: 15 minutesCook time: 35 minutesMakes: 4–6 servings You'll need: 1 tbsp olive oil 2 carrots, cut Half butternut pumpkin, diced 2 sticks celery, diced 1 large onion, finely chopped 1 tsp ginger paste 3 garlic cloves, minced 500ml–1L chicken broth (adjust to desired consistency) 2 Gelpro Beef Liver capsules 1 small sprig rosemary 1 cup lentils 1 lemon (zest and juice) 2 eggs Cooked roasted chicken (from Coles), shredded 1 tbsp each of chopped dill and parsley Salt and black pepper, to taste Method: Heat the olive oil in a large pot over medium heat. Add the onion, carrots and celery with salt and pepper, and cook for about 5 minutes until softened. Stir in the ginger, garlic, rosemary and lentils. Cook for 1–2 minutes until fragrant. Pour in the chicken broth along with the contents of the beef liver capsules, and bring to a gentle simmer. Cook for about 20 minutes with the lid on, stirring occasionally. Add extra broth or water if needed to keep the soup at your preferred consistency. Stir in the shredded chicken and lemon zest. Simmer for 5 minutes. Remove the rosemary sprig and reduce the heat to low. In a bowl, whisk together the eggs and lemon juice. Slowly whisk in 1–2 ladles of hot broth to temper the eggs. Gradually pour the egg mixture back into the soup, stirring constantly until the soup becomes slightly creamy. Turn off the heat. Season with salt and plenty of black pepper. Stir through the dill and parsley and serve hot with bread. NOTE: This soup will keep for up to 3 days in the fridge in an airtight container, or you can freeze individual portions for up to 2 months. Reheat gently on the stovetop — avoid boiling once the eggs have been added, to keep the broth silky. If you make this soup, please share it with us by tagging us on Instagram @gelproaustralia #gwellclub #gelproaus
Learn more
Apple Butter Baked Oats
Warm, spiced and spoonable — these Apple Baked Oats are the ultimate cosy breakfast. A single-serve bowl of oats and banana baked until fluffy in the air fryer, topped with homemade apple butter for a spoonful of orchard sweetness. A tablespoon of Gelpro collagen woven through the batter gives every bite a quiet protein and gut-loving boost. Prep time: 5 minutesCook time: 15 minutesMakes: 1 serve (plus a jar of apple butter to keep) You'll need: Baked Oats 1/4 cup oats 1/4 cup milk of choice 1 banana, mashed 1 tsp baking soda 1 tbsp Gelpro Peptipro Collagen 1 tbsp apple butter (recipe below) Extra stewed apple or apple butter, to top Apple Butter 4 apples, peeled and cubed 1/2 cup coconut sugar 1 cup water Juice of 1 lemon Cinnamon, to taste (about 1 tsp) Method: Apple Butter (make ahead — keeps for up to 2 weeks in the fridge) Combine the cubed apples, coconut sugar, water, lemon juice and cinnamon in a small saucepan over medium heat. Bring to a gentle simmer, then reduce the heat to low. Simmer uncovered for about 30 minutes, stirring occasionally, until the apples are soft and the liquid has reduced to a thick, glossy sauce. Remove from the heat and blitz with a hand blender until smooth. Transfer to a clean jar and allow to cool before refrigerating. Baked Oats Preheat your air fryer to 170°C. In a small bowl, mash the banana until smooth. Add the oats, milk, baking soda, Gelpro Peptipro Collagen and 1 tbsp of apple butter. Stir together until well combined. Transfer the mixture into a small oven-safe ramekin or dish that fits your air fryer. Bake for 15 minutes, or until the top is golden and the centre is set. Top generously with stewed apple or an extra spoonful of apple butter, and enjoy warm. NOTE: This recipe makes one generous single serve of baked oats, plus a jar of apple butter that will keep in the fridge for up to 2 weeks — perfect for spreading on toast, stirring into yoghurt, or making this recipe on repeat. If you don't have an air fryer, bake in a preheated oven at 170°C fan forced for 18–20 minutes. If you make these baked oats, please share it with us by tagging us on Instagram @gelproaustralia #gwellclub #gelproaus
Learn more
Chocolate and blueberry cheesecake – grain free and sugar free
Chocolate and blueberry cheesecake – grain free and sugar free SPECIAL EQUIPMENT Muslin cloth for dripping yoghurt 9-inch spring form cake tin Yoghurt maker (optional) Hand held stick blender (optional) Food processor or blender (optional) Electric cake beaters (optional) Ingredients: BASE 1 cup almond meal 1 cup desiccated coconut 40 grams of butter or coconut oil 1/3 cup raw cacao or premium cocoa 1 tablespoon of honey CREAMY CHEESE LAYER 2 cups yoghurt (homemade or plain Greek) dripped to remove the whey. Find out how here 200 grams of pure cream ¼ cup water 1 ½ tablespoons of gelatin powder (red tub) 2 teaspoons of vanilla BLUEBERRY JELLY LAYER ½ cup blueberries for making the jelly 1 cup of blueberries for inside the jelly 1 ½ cups water 2 tablespoons of gelatin powder (orange tub) 1/8 teaspoon of powdered stevia or a few drops of liquid ½ tablespoon or more to taste of Honey Extra blueberries for decorating the cheesecake Method: BASE Preheat the oven to 160 degrees Celsius. Grease the bottom of the spring form tin with either butter or coconut oil. Combine all the ingredients in a blender or food processor until the mixture forms a dough-like consistency. Press the dough into the greased cake tin with the tips of your fingers or the back of a spoon. Bake for only 5 minutes. The base is best barely cooked! Note: It may rise in the oven but it will flatten again once it cools. Allow to cool completely before adding the creamy cheese layer. CREAMY CHEESE LAYER Drip the yoghurt in a muslin cloth for 1 – 2 hours. This can be done the day before or before you begin the base. Place the dripped yoghurt, cream cheese in a large mixing bowl and set aside. In a small saucepan mix together the water and gelatin powder until it forms a thick paste. Place on a low heat and stir until the paste liquefies. Do not boil. Remove from the heat and add the honey and vanilla. Slowly whisk in the cream. Note: the chilled cream will immediately begin to set the gelatin. If the mixture is beginning to set too quickly, briefly return to a low heat to ensure the cream and gelatin is thoroughly combined. Do not overheat or boil. Allow the cream mixture to cool to below 40 degrees Celsius before adding mixture into the dripped yoghurt.Note: Yoghurt has live bacteria in it that is heat sensitive. When it has cooled sufficiently, quickly mix the cream mixture into the dripped yoghurt. I use electric beaters for this but it could be done by hand. The chilled dripped yoghurt will begin to set the gelatin so it is best to work fast! Spread the creamy yoghurt mixture onto the base. It sets quickly. Use a knife to even and smooth the top. Wipe the sides of the cake tin with a damp clean cloth. Sprinkle 1 cup of thawed berries onto the creamy yoghurt layer. BLUEBERRY JELLY LAYER In a small saucepan simmer the blueberries in water for approximately 10 minutes. Remove from heat and blend fruit and water with a hand stick blender Add stevia and honey. Add additional honey if you like. Do not add more stevia or else a bitter taste may result. Add gelatin powder and stir. Return to a low heat and continue to stir until gelatin powder is completely dissolved. Do not boil. Allow blueberry mixture to cool down but not begin to set. (under 40 degrees Celsius is best) Gently pour the blueberry gelatin mixture over the back of a spoon and onto the creamy cheese layer. Place in the fridge to set. Serve with extra blueberries and a dollop of cream.
Learn more
Perfectly Balanced Banana Bread
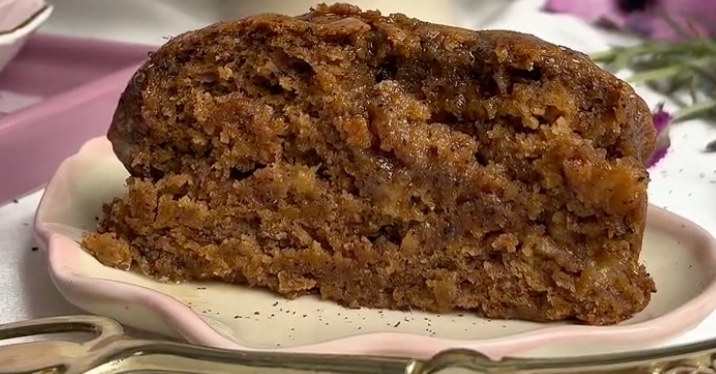
This perfectly balanced 'traditional' Banana Bread is incredibly moist light and packed full of good fats, protein and incredible flavour. Prep time: 15 minutesCook time: 55 minutesMakes: 12 large servings You’ll need: 3 cups of organic wheat or spelt flour (we’ve also tested it with buckwheat flour and it was just as great) 1 tspn baking powder 1 tspn bicarb soda 1 tspn organic maca powder 1 tspn nutmeg 1 tspn cinnamon 3/4 cup of raw organic sugar or coconut sugar 5 medium overripe bananas 6 tbsp Peptipro Collagen 3 organic eggs 1/2 cup of room temperature grass fed ghee 1/2 cup of chunky chopped walnuts + extra for garnish (optional) 3/4 cup of your milk of choice 1/4 cup of apple cider vinegar 1 tspn vanilla extract 1 teaspoon of salt Method: Preheat your oven to 170 degrees Celsius. Line a 20cm x 25cm baking tray with baking paper. In a large bowl, sift together flour, baking powder, bicarb soda, maca powder, nutmeg and cinnamon. Add salt & sugar into the dry flour mixture. In a medium bowl, mash together 4 of the bananas. Gently whisk in the eggs, ghee and vanilla, and set aside. In a separate bowl, combine 3/4 cup of milk with 1/4 cup of apple cider vinegar, and set aside. Add the egg & banana mixture into the flour mixture. Add walnuts and gently fold the mixture until half combined. Add in the soured milk mixture and continue to fold the mixture gently until completely combined. Take care not to overmix the mixture, as overmixing will result in a more dense banana bread. Transfer the mixture into the baking tray and level the batter. Slice your remaining banana into four thin and even slices & gently place on top of your banana bread as a garnish. Sprinkle with a some chopped walnuts. Bake for 55 to 60 minutes, or until a wooden skewer inserted into the centre comes out clean. Once cooked, remove from oven, transfer to a cooling rack and allow to cool for 10-15 minutes. Serve with salted butter and your favourite cup of tea. NOTE: This banana bread will keep for up to three days at room temperature when stored in an airtight container or up to 7 days in the fridge. If you make this banana bread, please share it with us by tagging us on Instagram @gelproaustralia #gwellclub #gelproaus
Learn more
Chewy Collagen and Chocolate Chip Cookies (GF)
The best part about these collagen & choc chip gluten-free cookies? They're guaranteed to turn out perfect every time, even if you overmix the dough! These cookies are delightfully soft and chewy. We used dark chocolate, chopped chunky for a little extra chocolate ooze. Prep time: 10 minutesCook time: 15 minutesMakes: 16 cookies You'll need: 1/3 cup butter or ghee softened at room temperature 1/2 cup coconut sugar 4 tbsps Peptipro collagen 2 tbspn organic molasses or maple syrup 1 egg 1 tspn vanilla extract 1 3/4 cup buckwheat flour 1/2 tspn baking soda 1/2 tspn salt 1/2 cup of dark chocolate, chopped chunky Instructions: 1. Preheat your oven to 170 degrees Celsius. 2. Sift together buckwheat flour & baking soda, and set aside. 3. Cream together butter or ghee, coconut sugar, Peptipro and salt. 4. Add molasses or maple syrup, an egg, vanilla extract & whisk on medium speed until completely combined. 5. Fold in half of the buckwheat flour mixture. Add chocolate chips & the remainder of the flour and fold until the mixture comes together. 6. Allow the cookie dough to rest in the fridge for at least 30 minutes. Note: The longer you allow the dough to rest the most complex and toffee-like the flavour will be. 7. Use a scoop or spoon to portion the mixture. Gently roll the dough into a ball & place on a tray lined with baking paper. Ensure that the cookies are well spaced out, leaving approximately 8-10cm of space between them. 8. Use two of your fingers to flatten down the cookie. 9. Bake for 12-15 minutes or until golden. Transfer the cookies from the oven onto a cooling rack and allow to slightly cool. Sprinkle with sea-salt flakes and serve. Note: Take the cookies out at 12minutes just as they begin to brown on top if you prefer a more gooey and soft cookie. The cookies can be kept stored in an airtight container up to 5 days, although we highly doubt that they'll be around for longer than a few hours. If you make these cookies, please share it with us by tagging us on Instagram @gelproaustralia #gwellclub #gelproaus
Learn more
Coconut and Collagen Breakfast Muffins
High in protein, and guaranteed to leave you feeling satisfied. These healthy, dairy-free muffins are crumbly and light thanks to a few carefully considered ingredients. Combining apple cider vinegar with kefir ensures that they'll be a little fluffier than most flourless muffins, but nonetheless, be careful not to over-mix the batter. Prep time: 5 minutesCook time: 15 minutesMakes: 6 muffins You'll need: 3/4 cup Organic Quick Oats 1/4 cup Organic Coconut Flour 2 tbsp Organic Coconut Sugar 3 tbsp Peptipro Collagen 1/2 tspn Bi-Carb Soda 1 tspn Baking Powder 1 Egg 1/4 cup Flaxseeds 1 tspn Salt 1 tbsp Black Chia Seeds 1/2 cup Coconut Kefir 1 tbsp Organic Apple Cider Vinegar 2 tbsn MCT Oil 1 tspn Vanilla Extract Instructions: 1. Preheat your oven to 180C. Line a muffin tray with muffin cases. 2. Add the apple cider vinegar to the coconut kefir & set aside. 3. Combine all the dry ingredients in a bowl (oats, coconut flour, coconut sugar, Peptipro, bicarb soda, baking powder, chia seeds, flaxseed and salt.) 4. Add the wet ingredients (coconut kefir, apple cider vinegar, egg, vanilla extract & MCT Oil) into the dry ingredients & mix until combined. NOTE: Avoid overmixing the batter to keep your muffins fluffier. 5. Divide the batter evenly across the muffin tray and sprinkle extra flaxseed flakes and chia seeds on top. 6. Bake for 15-20 minutes or until golden. Remove from oven, transfer to a wire rack and allow to cool. If you make these muffins, please share it with us by tagging us on Instagram @gelproaustralia #gwellclub #gelproaus
Learn more
Gut Loving Sweet & Sour Gummies
There's something about sweet and sour gummies that brings us back to our childhood and almost feels like a naughty treat. These Grapefruit, Passionfruit & Orange gummies are perfectly balanced and a wonderful way of sneaking in additional nutrients into your diet. We included a generous teaspoon of our Marine Collagen and two capsules of our Native C for added skin & immunity benefits. Prep time: 10 minutesSetting time: 2 hoursMakes: approx 12 gummies For this recipe, we chose Ruby Red Grapefruit and we kept it separate from the orange & passionfruit juice so that we could also create some playful two toned gummies. Ingredients you'll need: 1 cup of freshly squeezed grapefruit juice 2/3 cup of orange juice 1/3 cup of passionfruit pulp 4 tablespoons of Gelpro Natural Beef Gelatin powder (2 tbsps per cup of juice) 2 tablespoons of organic raw honey 2 capsules of our Raw Native Vitamin C 1 heaped teaspoon of Marine Collagen Silicon mould of choice or a glass tray How to make Gut Loving Sweet & Sour Gummies: Add 1 heaped teaspoon of Marine Collagen to the Grapefruit Juice. Combine 2 tablespoons of gelatin with the juice and stir over a low heat until completely dissolved. Half fill the silicon moulds with the grapefruit juice mixture and allow to set in the fridge for approximately 10 minutes. This will ensure that this layer of the gummy will not be disturbed when you pour your second juice mixture into the mould. Empty two capsules of Native C into the Orange & Passionfruit Juice. Add two tablespoons of honey, 2 tablespoons of gelatin and stir over a low heat until completely combined. Completely fill the moulds with the orange & passionfruit mixture. Allow to set in the fridge for approximately two hours before removing from the moulds. Notes & Tips These gummies can be stored in the fridge in an airtight container for up to 5 days. If you don't wish to achieve the two toned gummy effect, you can combine all the ingredients together in quick and one easy step. If you don't have a silicon gummy mould, you can also use a shallow glass tray, lightly greased with ghee or olive oil. This will make it easier to remove the gummies from the tray. You can also swap the Marine Collagen for our Peptipro Collagen. If you make these gummies or any version of them, please share it with us by tagging us on Instagram @gelproaustralia #gwellclub #gelproaus Watch us make it on Instagram: View this post on Instagram A post shared by Gelpro Australia (@gelproaustralia)
Learn more
Decadent Peruvian Panna Cotta
This recipe was adapted from and inspired by Sheridan Joy's Panna Cotta.It's chocolatey, decadent and creamy yet incredibly light. Prep time: 5 minutesCook time: 5 minutesServes: 2 You'll need: 3 tablespoons of Natural Australian Gelatin 100ml of room temperature water 400ml (one can) of organic coconut cream (check for no gums) 3 tablespoons of MCT Oil (ensure a creamier consistency) 2 tablespoons of Collagen + Peruvian Superblend 2 tablespoons of Organic Cacao Powder 3 tablespoons of Organic Coconut Sugar 2 Organic Mushroom Superblend Capuslues Cacao Nibs for Garnish Instructions: 1. Bloom the gelatin by adding it to 100ml of room temperature water. 2. Pour Organic Coconut Cream & MCT Oil into a saucespan, and place on the stove over a medium heat. 3. Add Organic Cacao Powder, Organic Coconut Sugar, Collagen+ Organic Peruvian Superblend and empty the Organic Mushroom Superbelnd Capsules into the mixture. Stir together until well combined. 4. Add the bloomed gelatin into the mixture and mix together over a lower heat until everything is seamlessly combined. 5. Pour into a serving dish and allow to set in the fridge for approximately 1 hour. Watch us make it on instagram: View this post on Instagram A post shared by Gelpro Australia (@gelproaustralia)
Learn more